Aloha, all!
My projects all this week will be Valentine’s Cards. Yes, I did get some birthday cards made over the weekend, and I think that I’ve got the beginning of February covered. But now I’ve got to get the middle of the month covered as I’ll be otherwise occupied at the beginning of next week. I’m finally going to have a cataract in my right eye removed. I’ve been ready for this for a long time, and I finally got the go ahead last month, and I’m scheduled for it next week. Where I live in Hawaii, it’s not just a matter of going to the doctor’s office and having it done and come home to go back for a check up the next day. Nope. I have to fly to Honolulu and stay overnight. And my husband has to come with me (not a problem – I love having him along). So it’s a project. The good news is that it will be done and over with! The bad news is that I don’t have much time left before that event, and the Valentine’s cards have GOT to be finished!
Oh, and what a perfect time to have the Stampin’ Up! Only Challenge this week be to make a Valentine Card! I love getting two things done with one project (I’m not killing two birds – I’m not even killing one. Poor things!)

This card is a CASE from one made by fellow Stampin’ Up! Demonstrator, Linda Bauwin. Her card was not a Valentine’s Day card, but I could immediately see how I could use her design using a central heart rather than the oval shape she used for the front of the card.
The main step in this card is to create a mask using a shape that you’ve die-cut into a piece of cardstock that’s about the same size as the front of your card. Then you use the mask to lightly sponge in some color and finally stamp images over the sponged area. As I wrote that, I realized that the best way to tell you how this card is made is to give you a link to the tutorial that I gave to my monthly card-making class earlier this month. But I’ll still go on to tell you about the products that I used for this project.
The first step is to cut the heart out of the separate piece of cardstock using one of the hearts in the Sweet and Sassy Framelits set. I used the largest heart with the pointy tip on it so that it coordinated well with the shapes of the hearts that I was going to stamp onto the sponged heart. I sponged the heart all around the edges and then into the center area of the heart. It’s important to sponges all around the edges as just stamping the smaller hearts inside will not allow you to end up with a really recognizable heart shape unless you stamp way too many (for my taste at least).
The heart stamps that fill in the sponged heart are from the Heart Happiness Stamp Set in the Stampin’ Up! 2018 Occasions Catalog. For this card, I used Blushing Bride Ink to sponge the background and I used Blushing Bride and Real Red Ink for the hearts. I also used Real Red Ink for the word, Friend, stamped under the die-cut “Amazing.” This die-cut word is from one of the FREE Sale-A-Bration sets available during this year’s promotion. It’s also one that’s going to be carried over into the Annual Catalog, which is somewhat unusual for products in the Sale-A-Bration catalog. So I snatched it up as soon as I’d bought $100 worth of other products, which qualified me to be able to get the Celebrate You Thinlits set for FREE.
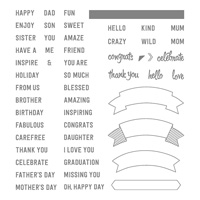
What’s really nice about this card is that, if you use the Thoughtful Banners Stamp Set for the word to go with the “Amazing,” you’ll be able to customize this for just about anyone on your Valentine Card list.

Inside the card, I stamped the “My Valentine” sentiment from the Bloomin’ Love Stamp Set that’s in the 2017-2018 Stampin’ Up! Annual Catalog. I’m using that inside most of my Valentine Cards this year just to keep things simple. I used Real Red Ink for it, too.
I hope this will do a little bit to inspire you to make a Valentine Card during this Stampin’ Up! Only Challenge, which goes on for 12 days, beginning today.
Here are the products I featured in this blog post. All of the products that I used for the project are listed in the tutorial to which I linked above. It’s a fun project to try!